
Easy Garlic Rolls Recipe With Whole Wheat
Ingredients
My Cup Measures 250 ml
For The Dough
- 1.5 Cups Whole Wheat Flour
- 1/2 Cup Semolina, Fine
- 3/4 Teaspoon Salt
- 3/4 Teaspoon Honey/Brown Sugar
- 1/2 Teaspoon Instant Yeast
- 1 Teaspoon Garlic Powder (Optional)
- 1 Cup Lukewarm Water
- 1 Tablespoon Oil
Filling
- 2 Tablespoon Oil
- 1 Teaspoon Minced Garlic
- 1/2 Teaspoon Oregano
- 1/2 Teaspoon Mixed Herbs (Optional)
- 1/2 Teaspoon Basil, Dried (1 teaspoon if using Fresh)
- 1/2 Teaspoon Parsley, Dried (1 teaspoon if using Fresh)
For Topping
- 1 Tablespoon Milk, For Brushing Before Baking
- 1 Tablespoon Butter, For Brushing After Baking
Instructions
For The Dough
-
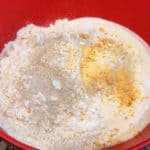
Take whole wheat flour, salt, dried yeast, sugar and garlic powder in a big bowl and whisk nicely.
-
Knead it using lukewarm water. Having lukewarm water is very important. It should be such wherein you can put your fingers comfortably.
Too hot water will kill the yeast and if not warm then yeast will not activate. -
Add oil and continue kneading.
-
Put the dough on your kitchen counter and knead for another 4 to 5 minutes. Stretch the dough using the heel of your hands, fold it, then again stretch. Soon the dough will be smooth and shiny.
-
Grease the bowl liberally, put the dough in it, invert the dough so that the top also gets oily. Cover it with a plate or lid and let it rise for an hour or so till doubles in volume. Time is just a rough guide and will depend on the weather. If too cold then it may take even longer. So, instead of time, watch your dough.
-
While the dough is proofing, prepare the filling.
-
For Filling, heat oil in a pan, saute minced garlic and all the herbs for 30 seconds or so. Use when completely cool.
-
When the dough has risen, punch it to release the gases. Knead it lightly for few seconds.
-
Divide the dough in 2 equal parts. Keep one part covered and work with the other part.
-
Sprinkle dry flour on the kitchen platform and roll the dough using a rolling pin. Keep the dough 1/4'' thick. Ensure that you are able to lift the dough easily without sticking or tearing.
-
Spread a layer of filling on this rolled dough.
-
Roll it. Seal the edges with the pinching motion. For this, wet your hands and then do it. This will making it easy.
-
Using a pizza cutter/knife, cut roundels. Slightly press the discs with your palm so that they flattens up a bit.
-
Keep the roundels in a greased baking tray. Leave a little gap between rolls.
-
Cover it with a kitchen napkin and leave it for 20 to 25 minutes for second proofing. During this time, rolls will further double up in volume.
-
After 15 minutes, start preheating the oven at 190 degrees for 10 minutes.
-
Brush the rolls with milk and bake for 20 to 25 minutes or till the rolls are golden brown. Keep the baking tray in the middle rack.
For the initial 15 minutes, bake with only the bottom rod on. After 15 minutes, use both the rods so that the top gets beautiful golden colour.
-
After taking out of the oven, keep the rolls on a wire rack.
-
Brush the rolls with butter, this will give a shine to the rolls.
-
If not serving immediately then cover these with moist cloth. Covering with dampened cloth will keep the rolls soft.
-
Once completely cool, keep them in an airtight container.
-
Serve with love, mayonnaise/hummus optional.
Recipe Notes
- Use warm water only for kneading otherwise the yeast will not activate and consequently, your dough will not rise.
- To replace instant yeast with active dry yeast, use 2/3 tsp. As 1 TSP INSTANT YEAST = 1.25 TSP ACTIVE DRY YEAST.
- You can use the same quantity of sugar in place of honey.
- Rising time depends on the quantity of yeast and on the weather conditions. During summers it may rise in 45 minutes to 1 hour. Whereas in winters it may take even up to 2 hours.
- When dividing the dough into 3 or 4 parts, it’s better to roll a log and cut with pizza cutter. Do not tear it with hands as it may destroy the gluten developed during rising. If you want to use just half the dough, then after deflating and dividing, pack the remaining half in cling film, place it in an airtight container and keep in the refrigerator up to 24 hours.
- The rolls rise during the rising time as well during baking, so it is necessary to keep a substantial gap between the two otherwise they may stick to each other.